
Kotlie Multi Capsule Coffee Machine Review

Author’s Note: As always, this is not a paid or sponsored review. I bought this machine with my own grubby money. I have no affiliation with Kotlie or Amazon. I do NOT earn any money if you buy this machine. Enjoy, my fellow skeptics!
More flexibility, but also more fuss.
I had a cheap little knock-off Nepresso pod machine (Bestpresso brand) for a few years. But it bit the dust two months ago. I bought this Kotlie EM-308B machine because I was intrigued by the “Multi Capsule” potential.
Here’s my snarkalicious summary, if you’re in a hurry:
The Kotlie machine has more features, but a much steeper learning curve. It’s not as quick or simple to operate. It’s a bit messier than a typical pod machine; there’s no capsule collection, and there’s no storage in the machine for the many bulky accessories.
It brews very good espresso, with rich flavor and well-developed crema. If you switch from pods to grounds, you could save hundreds or even thousands of dollars a year.
And here’s a super-duper scientific rating scale, if you need a visual:

Brewing options
You get four different “pod drawers.” That’s what I’m calling them: drawers. They slide in and and out of the machine like a drawer, anyway. These are configured for different types of coffee pods, capsules, or grounds.

You can opt for:
- K-Cup
- Nepresso (Original, not Verturo)
- Grounds (or ESE pod)
- Dolce & Gusto
The drawers are (helpfully) labeled on the front. After using this machine for a couple months, I still have to peer carefully at the label to make sure I’ve selected the right one. This is no fun when you’re half asleep. Color coding here would be fabulous.

The downside of the drawers is that they have to be fully removed from the machine to load the pods, manually emptied after brewing, and stored between use. This wasn’t the case with my last machine. It’s not a huge time drain, but it’s definitely a consideration.

Simple instructions, but so many options
The machine comes with a thick user’s manual. I found it relatively straightforward to read, with clear diagrams and detailed information. No complaints here. It just takes a while to digest.

If you are used to the ease of just dropping a capsule into a machine and immediately cranking out a shot of espresso (like I was), there’s a much bigger learning curve here. And it’s not quite as effortless, overall.
Settings
You have to select water level (7 options), water temperature (3 options), pod type (6-ish options) and whether you want to “pre-soak” the grounds. It took me a lot of trial and error to figure out the right settings here. Also, you have to install/fully remove (and empty) the drawer for each and every cup brewed. If you’re in a rush, this is a pain. Especially if you need to brew two pods (two shots) in succession.
It saves your previous settings
Fortunately, the machine saves your previous settings. So, if you’re brewing the same thing every day, you can just turn it on, load your pod, and hit brew.
Keep the user’s manual handy
If, however, you are switching things up from one day to the next, you’ll need to remember which water level, temperature, and other settings work for your chosen coffee type. A simple “cheat sheet” printed on the top of the machine would be helpful here. Alas. The user’s manual has a complex chart, but most of us aren’t going to pull out a booklet each morning.
Quality espresso shots
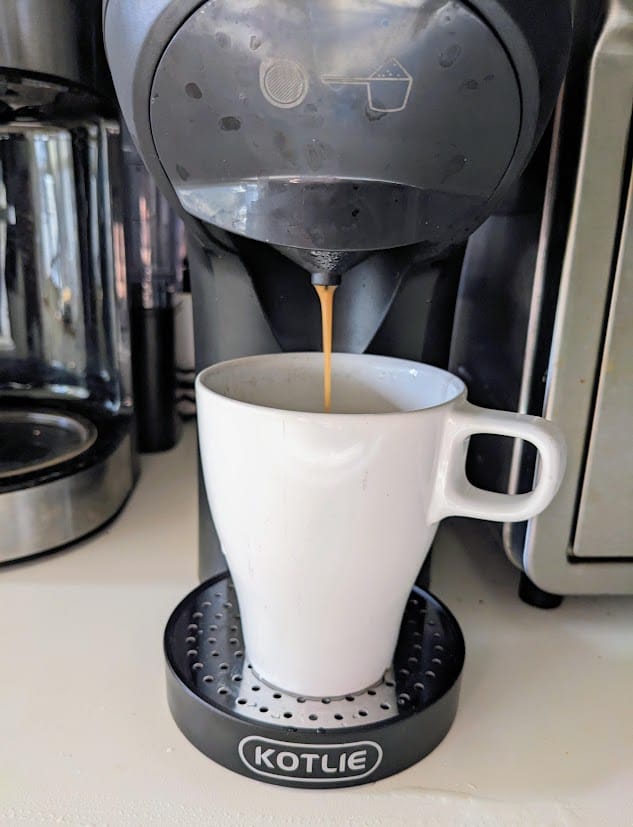
The upside is that, once I figured it out, it makes very good espresso! This machine is supposed to have 19 bars of pressure (there’s a debate over what that actually means, in practice). I’m getting a great layer of rich crema on top of my shots, even with 2-week old, pre-ground, inexpensive espresso from Aldi. Behold:

I do appreciate having the ability to make two shots of espresso at once, although this is only an option with the grounds cup, not with pods.
And this is a shot of Nepresso (Starbucks Espresso brand):

“Pre-soak” feature for better crema
I think one of the boons of the Kotlie model is that it has a “pre-soak” feature. It shoots hot water into the capsule or grounds, then pauses for a few seconds before resuming brewing. I get a richer brew and better crema when I choose this feature.
Which settings do I use?
I had to experiment a lot with the settings, especially with the water level selection. Ultimately, I determined Level 2 was “best” for one shot of a Nepresso pod. And Level 3 is best for 2 shots from the grounds cup (yes, this is anti-intuitive — shouldn’t it be Level 4???).
But, it varies with what type of grounds are used and how tightly compressed/finely ground they are. I get a lot more liquid/more diluted shots when the grounds are coarser or less compressed. Sometimes I choose Level 4 when brewing two shots from the grounds. So, you’ll likely need to play around with the specific type of coffee you have.
I always use the hottest water option (red) for espresso shots. And I always select the “pre-soak” feature.
How much water does the machine hold?
The Kotlie water tank holds twice as much water as my last model. About four 8-ounce cups (the product info says 34 ounces). If you’re brewing 1-ounce shots, that’s approximately 30-34 shots before refilling the tank. Not to be “that person,” but that’s not necessarily a good thing — the water lasts longer, but it has the potential to be less fresh. Just saying. Conveniently, you can either remove the whole tank, or pour water through the smaller hinged flap on top. I do the latter.

Mine doesn’t leak. So far. That was the downfall of my last (Bestpresso) model — towards the end of its life, it was non-stop leak-fest. I have not had a single drop leak from this one. The machine feels sturdy and well-made.

Touch screen
The touch screen works well. It beeps politely. The lights make the buttons easy to see. But, just a note: it won’t work if there’s no drawer in the machine. It took me a while I figure this out. I just wanted to run hot water through the device, and I couldn’t figure out why the touch screen was suddenly “malfunctioning.” Duh. Just make sure the drawer is in place, and the handle is cranked down, and you’re good to go.
Noise level
It’s a relatively quiet machine. Not as quiet as a drip brewer. It has that “grrRRrr” motor sound, and the slightly high-pitched steam gurgle. Tormented coffee machine.
Initializing period
There’s a quick initializing period after you press the “power” button. I timed it at 29 seconds. Faster than my last model. During that initializing period, you can’t press any buttons, select options, or run the machine.
Doesn’t automatically power down
A potential downside is that the machine doesn’t seem to turn itself off. My last model (Bestpresso) turned itself off after a few minutes of inactivity. I’ve left my Kotlie model on for an extended period, and it never seems to shut itself off. You have to manually power it off. This is easy to do, of course. It’s just a matter of remembering to do it. Hmmph!

Drip tray
The drip tray can be installed low or high on the machine (to accommodate different cup sizes), and there’s a removable thick (well-made) metal insert. Because the drip tray is shallow, it doesn’t catch tons of liquid. I make sure to pour out the drips/wipe it after every use so that it doesn’t overflow. There isn’t much dripping from this machine, but it still helps to let the cup sit for several seconds after brewing.

Filling the grounds cup
You get a scoop (with a handy tamp for espresso grounds) and two metal cups to hold ground coffee (or an ESE filter pod). I used the large metal cup for two shots (two scoops tamped down), and the small/shallow metal cup for one shot (one scoop of grounds tamped down). Worked great.

Filling the grounds cup takes a few minutes: you have to fit the right metal cup into the correct plastic drawer, scoop/tamp the grounds, flip the hatch shut, slide the drawer into the machine, crank the arm down, and make your brewing selections. Actual brewing time is quick: about 30 seconds.

Unfortunately, you have to manually scoop the used grounds out of the cup and wash it out. I do this with a spoon over a trash can, and then rinse both the metal cup and the drawer thoroughly before leaving them to air dry. Not a deal breaker, but not as simple as a pre-made pod. A lot more mess and hassle. But it does save a substantial amount of money. More about the savings later.
Loading a Nepresso pod
Inserting the nepresso pods is absolutely more of a hassle than my last machine. The pod has to be fitted (bottom-side-up) into the slot, pressed securely in place (to pierce the pod), and then the hatch has to be firmly pressed shut (there’s some resistance when doing this). Then you have to slide the drawer into the machine, and crank the arm down.

To remove the spent pod after brewing, you have to do all of that in reverse: crank the arm up, pull the drawer completely out, flip the hatch open, and pry the pod out. It drips quite a bit of water everywhere while doing this. Boo.
If you’re a “two shot” kind of human (like myself), you’re doing all of this twice, just to get a single mug of your legal stimulant juice. Dislike.
(But my white countertops REALLY dislike!)

There’s no built-in bin in the machine to collect the spent pods. And there’s no way to automatically eject them, either. It’s always cranking the lever up, pulling the drawer completely out, manually removing/tossing the pod, and then wiping up the spilt liquid from countertops. It’s likely less messy than using a standard espresso machine, but that’s the nicest thing I can say.
Storing the accessories
Unfortunately, there’s no built-in storage in the machine for the accessories. And this is a LOT of “bits and bobs” to keep track of/store. I had to put mine in a bin in a cabinet. If the machine had a raised base underneath with a drawer to keep the … drawers… in, that would make a huge difference. Just sayin.’

Coffee types
So far, the types of coffee I’ve tried in my machine are:
- Starbucks Nepresso Espresso Roast Aluminum Pods (Amazon)
- Kirkland Whole Bean French Roast (Costco)
- Cafe El Morro Espresso (Aldi)
- Peet’s Major Dickason’s Dark Roast (Costco)
- Mt Comfort Peruvian Coffee (Costco)
I like the Cafe El Morro from Aldi — it has deep, dark flavor, but less “brightness.” A slightly flatter taste. I preferred to mix the Cafe El Morro with the Mt Comfort Peruvian for that little pop of citrusy lightness (the Mt Comfort is too light a brew to use alone for espresso). Unfortunately, the Kirkland French Roast was hopelessly bitter/oily. (And I looove strong espresso. But this wasn’t it.) My least favorite option, by far. Sorry, Costco.

I think if I was going to pick just one of these, it would be the Peet’s Major Dickason’s Dark Roast. Here’s the crema on top of two shots of (freshly ground) Peet’s. Impressive. It has a chocolatey-deep taste, without as much acidic bite as other brews. It’s a rich, complex flavor profile that is satisfyingly dark without any burnt or bitter notes.

Compact machine size
This is a reasonably petite device, although it is an odd shape. I sort of wish the top was flat/flush so I could at least stack an empty capsule drawer on top. The sides are plastic, so your magnetic capsule holders won’t attach. Here it is hanging out with appliance friends in my kitchen. (The dimensions of the machine are: 4.5 x 12 x 11 inches, if that helps.)
Savings
After using this machine for a few months, I’ve realized I really like the option for “grounds,” instead of a pre-made pod. And, this offers some pretty significant savings. I already shop carefully for pod bargains (natch!), but still end up spending around 60 cents per Starbucks Nepresso Pod (original line). Therefore, a two-shot latte is around $1.20 in pods. Yikes.
Using my own grounds in this machine is around 22-25 cents for two shots (bulk coffee from Costco, or espresso from Aldi). That’s a savings of almost $1 per day (for me).
If you were buying more expensive pods (the same Starbucks Nepresso Original pods are $1.30 each at Publix, or $2.60 for a two-shot drink), you’d be saving substantially more. Just saying.
Assuming my math doesn’t suck: in a two-person household, drinking 2-shots each per day, the potential savings could be as high as $1737 per year. (That’s $2.60-0.22 x 2 people x 365 days).
“You could save thousands!” Haha. Why do I feel like a used car salesman? Or a smarmy timeshare peddler?

Price
I bought my Kotlie EM-308B machine on Amazon for $128, which was a “coupon price” (it’s currently $120, grrr). Compared to similar “off brand” pod machines, that’s a bit high. For comparison, at the time of purchase, I could buy a Nepresso-brand machine from Costco (which came with a separate electric milk heater/frother) for just $130. Again, for this purchase to make sense, I think you’d need to leverage the “multi-capsule” advantage. Otherwise, it isn’t a great value.
Dramatic Conclusion

In my opinion, this isn’t the right machine for folks who want minimal resistance between themselves and their cup of joe. If you’re very busy in the morning and just want to grab your hot bean juice and be on your way, this isn’t the ideal product. There’s more fuss and clean-up. It’s not great for people who hate making decisions.
But, if flexibility is paramount, and you want to experiment and have many options, I think this is a great machine. It’s surprisingly good at brewing either one or two shots of espresso from coffee grounds. And it does extract a decent crema. And you could save a lot of money by switching to grounds!
On my incredibly precise Awesome-o-Meter, this Kotlie Coffee Machine scores a “Maybe.” Overall, I’m not disappointed by this purchase.
The End.
More Reviews You Might Like (or Hate)
Check out these other reviews I’ve written. Or don’t. We can still be friends: